Configure FTP Track Result and Entry Uploads with Meetpro
This article explains how to upload results from MeetPro to AthleticLIVE for Track and Field meets using FTP.
View Cross Country Upload Instructions
Step 1: Enter Credentials
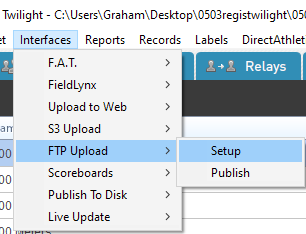
Within MeetPro, select Interfaces FTP Upload Setup from the menu bar.
Copy the FTP login details from your AthleticLIVE Meet Administration Portal into the FTP Setup dialog box.
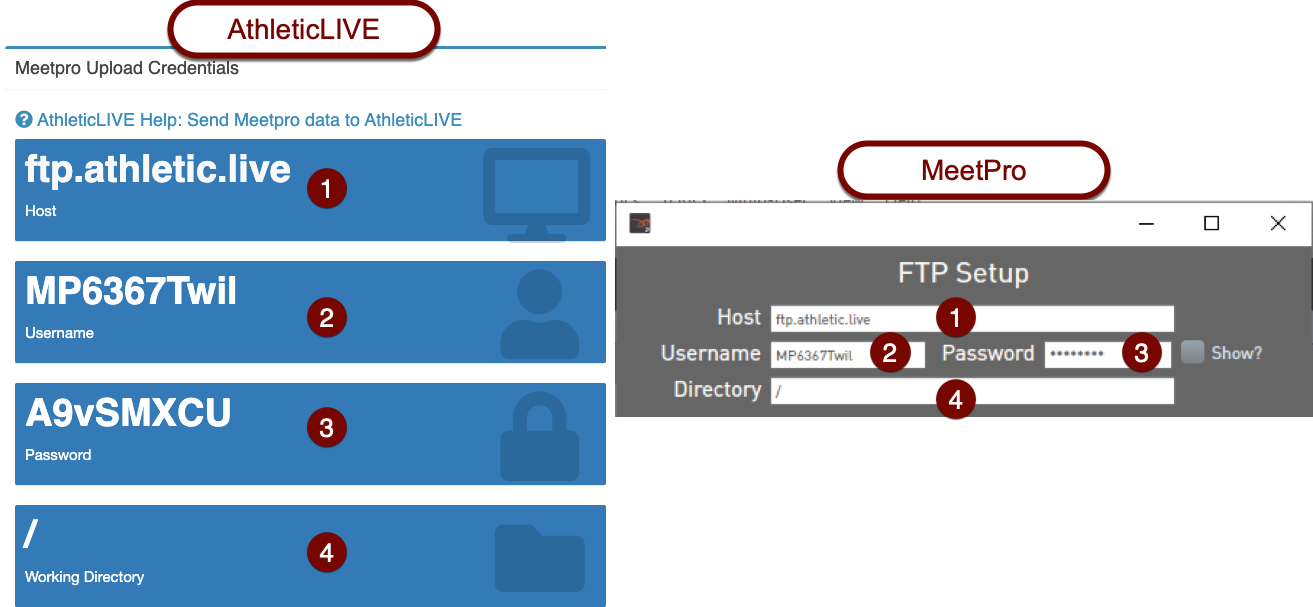
If you're using AthleticLIVE Local, then you should copy these settings directly from the main page on AthleticLIVE Local, rather than from your Meet Details page. See Introduction to AthleticLIVE Local and Install and Operate AthleticLIVE Local for more information.
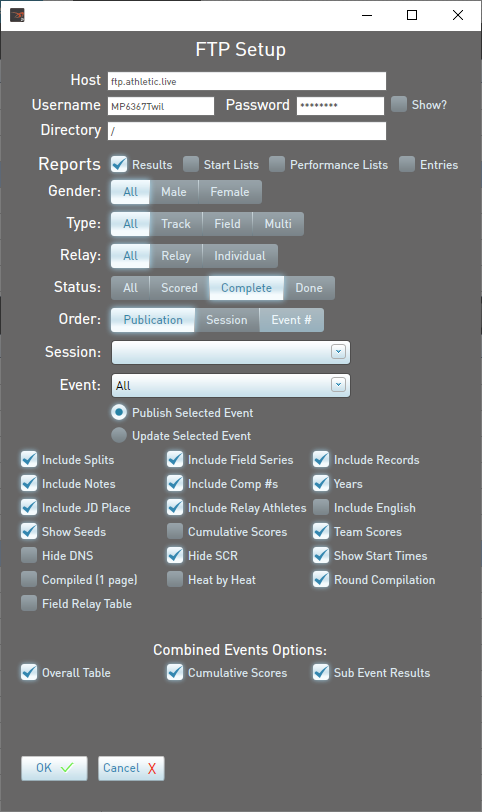
Step 2: Configure Settings
Before leaving the FTP Setup screen, you'll need to configure the FTP report settings.
Every time you perform an FTP upload with MeetPro, MeetPro uploads all reports, not just the ones that have changed. For large meets, this can be quite a bit of data! In addition to lengthening the time the upload takes, uploading lots of data can lengthen the amount of time our system takes to sort through what is new data and what is not. Therefore, we recommend checking only Performance Lists (according to what you'd like to publish) before the meet. Once the meet begins, we recommend unchecking all other boxes and only checking Results.

- Set Gender, Type, and Relay to All.
- Status:
- When uploading Start Lists or or Performance Lists, select All.
- When uploading results, select Scored if this is a scored meet. Select Complete if this is an unscored meet.
- Set Order to Publication.
- Session should be blank.
You may choose any report options that you like. Our recommendations are shown in the following screenshot.
Event Start Times
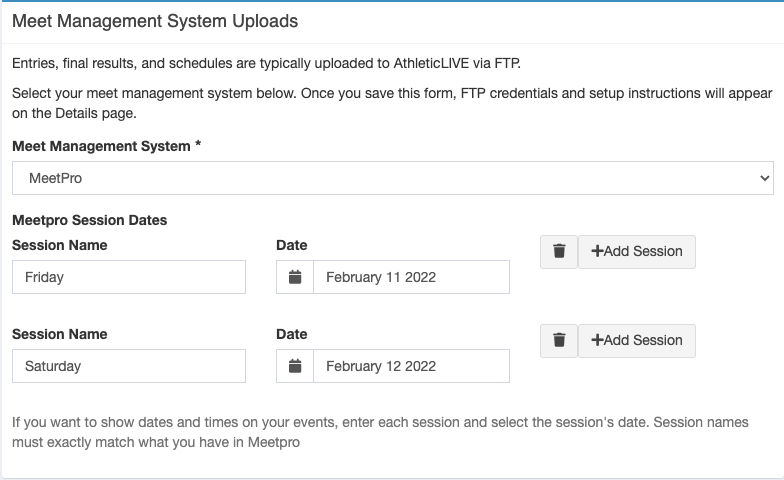
If you've configured your meet into sessions and added event start times, you can change the Order setting to Session and re-publish after your initial publish by publication order. This will show start times on all your events on AthleticLIVE. Once you've published via session order, return your settings to Publication Order for normal result uploads.
Also, on the Edit Meet page, you'll need to configure your MeetPro sessions. Be sure to match the session name exactly.
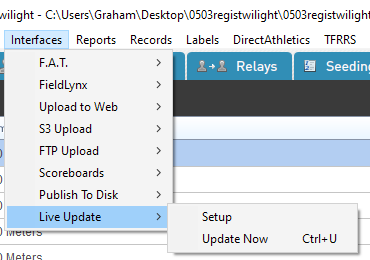
Step 3: Configure Live Update
You can configure MeetPro to automatically upload results when certain actions take place. We recommend configuring MeetPro to upload results when you mark an event complete or score the event:
From the menu bar, choose Interfaces Live Update Setup.
- Under Interfaces, select FTP.
- Under Auto Update check On Scoring and On Marking Event Complete.
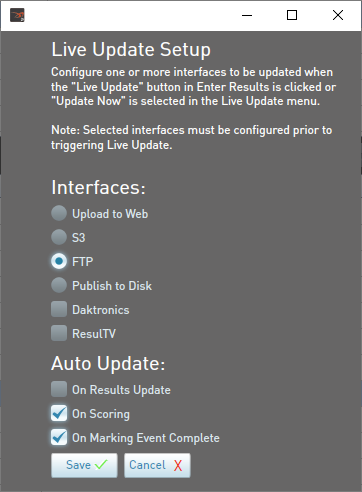
With this configuration in place, every time you score an event or mark it complete, the event will be uploaded automatically. If you'd like to do a manual upload, press the CTRL+U shortcut key or choose Interfaces Live Update Update Now from the menu bar.